
Using a laptop? Connect to the UCLA-MATHNET wireless network before you set up printing. Printers are not reachable from other networks.
On this page:
- Available printers
- Set up printing on Windows
- Set up printing on macOS
- Windows troubleshooting: printing hangs after a wrong password
- Mac troubleshooting: printing hangs after a wrong password
Available printers
Pick the printer closest to you that your account has access to. You'll need its name when you add it to your computer.
Graduate students, faculty, and staff
| Printer name | Location | Model |
|---|---|---|
AclPS |
MS 6187 | HP LaserJet 9040dn |
gclps |
MS 3347 | HP LaserJet 9040dn |
rrps |
MS 5379 | HP LaserJet 9040dn |
Applied Mathematics faculty only
| Printer name | Location | Model |
|---|---|---|
AppliedPS |
MS 7619 | HP LaserJet 9040 |
Applied2PS |
MS 7619 | HP LaserJet 9040 |
Other
| Printer name | Location | Model |
|---|---|---|
AmlPS |
To be updated | To be updated |
Bullpenps |
MS 3970 | HP LaserJet P3005 |
Faculty and staff only (Copy Room, MS 6384)
| Printer name | Location | Model |
|---|---|---|
ricoh1 (double-sided) |
MS 6384 | Ricoh IM C8000 |
ricoh2 (double-sided) |
MS 6384 | Ricoh IM C8000 |
cr2ps (double-sided) |
MS 6384 | HP LaserJet 9040dn |
crcolor (color) |
MS 6384 | HP Color LaserJet M855 |
Copy Room notes
- The Copy Room is locked. You need a key to get in.
- Please save
crcolorfor jobs that actually need color. Send text-heavy documents tocr2psinstead. - USB printing and scanning on ricoh1 and ricoh2: the USB drive must be formatted as FAT32. Drives formatted as NTFS, exFAT, APFS, or Mac OS Extended won't be recognized. On a Mac, choose "MS-DOS (FAT)" in Disk Utility. Formatting erases everything on the drive, so copy your files off first.
Set up printing on Windows
Setup has two parts: first save your Math account password in Windows, then connect to the printer on the print server, palomar.
Part 1: Save your Math credentials
- Press Win + R, type
control, and press Enter to open Control Panel. - Set View by to Large icons or Small icons, then open Credential Manager.
- Select Windows Credentials, then Add a Windows credential.
- Fill in the form:
Internet or network address palomarUser name math\yourusernamePassword Your Math account password - Click OK to save.
Part 2: Add the printer
- Choose a printer from the Available printers list (for example,
AclPS). - Open the Start menu (or press Win + R), type
\\palomar, and press Enter.
- A window listing the printers on palomar opens. Double-click the printer you chose to connect to it.
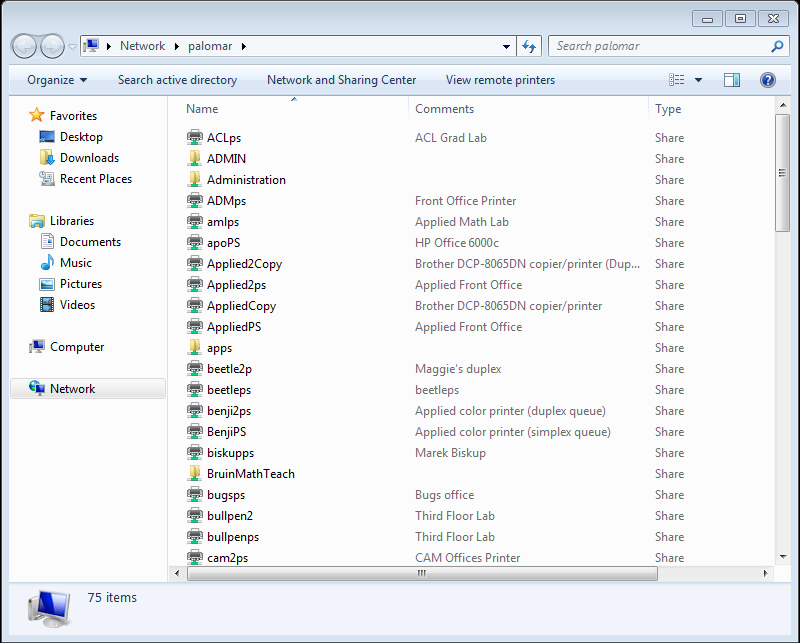
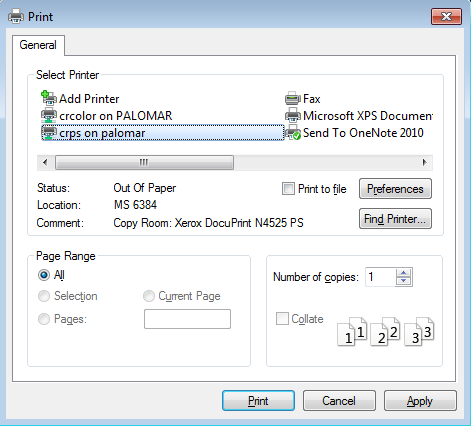
- To print, open your document, press Ctrl + P, select the printer, and click Print.
Troubleshooting: printing hangs after entering the wrong password
If you saved the wrong username or password in Credential Manager, Windows keeps sending the wrong credentials to palomar. Jobs then sit in the queue and never print. To fix this, correct or remove the saved credential and connect again.
- Press Win + R, type
control, and press Enter. Open Credential Manager, then select Windows Credentials. - Find the entry for
palomarand click it to expand it. - Click Edit to correct the username (
math\yourusername) and password, then click Save. If you're not sure what's wrong, click Remove instead and add the credential again using Part 1. - Delete any stuck jobs. Open Settings, go to Bluetooth & devices → Printers & scanners, select the printer, choose Open print queue, and cancel the jobs.
- Sign out of Windows and sign back in, or restart. Windows holds on to the old connection until you do.
- Print your document again.
Still not printing? Make sure you're connected to UCLA-MATHNET and that your Windows password was set at a Math Windows machine. If jobs still hang, remove the printer from Printers & scanners and add it again using Part 2.
Set up printing on macOS
Before you start: set your Windows password by logging in to a Math Windows machine. You'll enter this password when you print from your Mac.
- Choose a printer from the Available printers list (for example,
AclPS). - Open the Apple menu and choose System Settings (called System Preferences on macOS 12 and earlier).
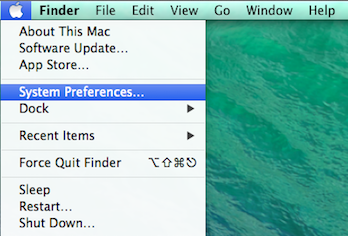
- Open Printers & Scanners.
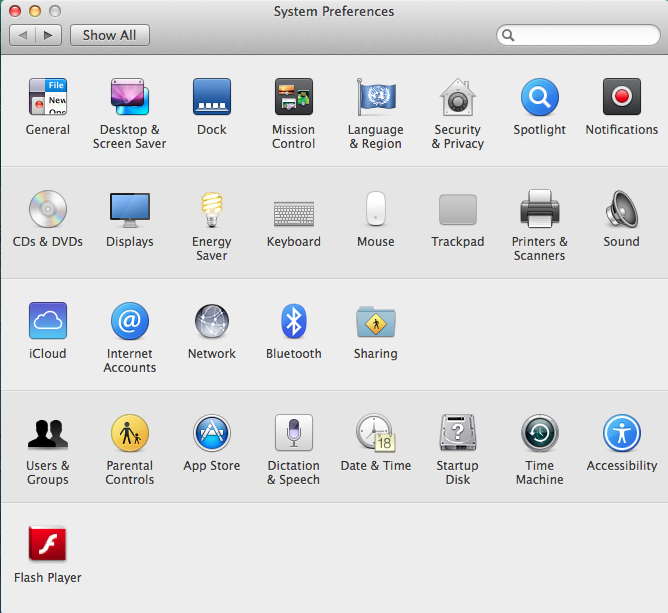
- Click Add Printer, Scanner, or Fax… (or the + button on older versions).
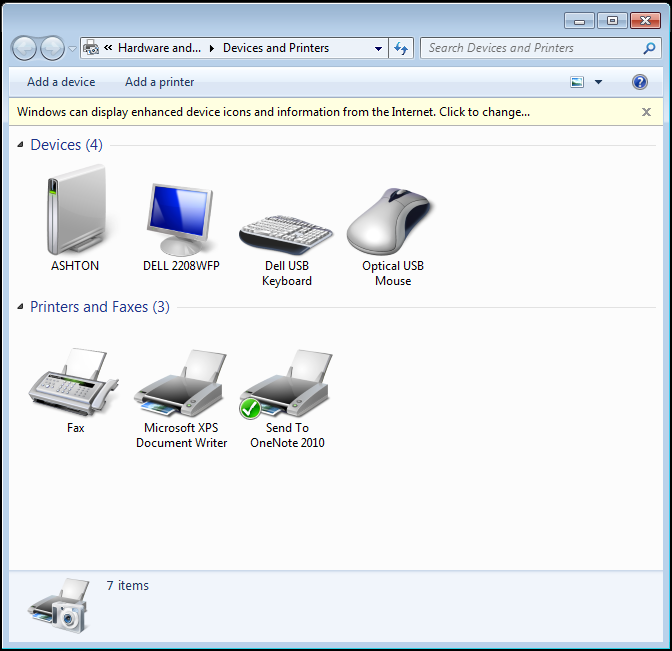
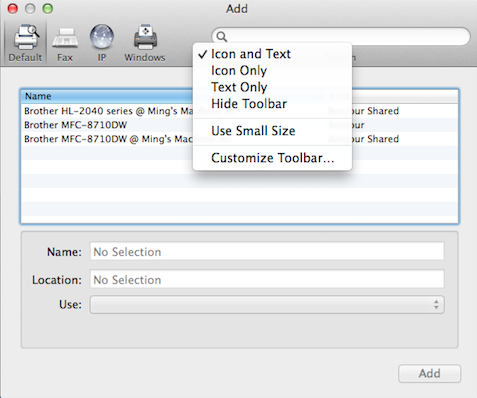
- In the Add Printer window, Control-click (right-click) the toolbar and choose Customize Toolbar.
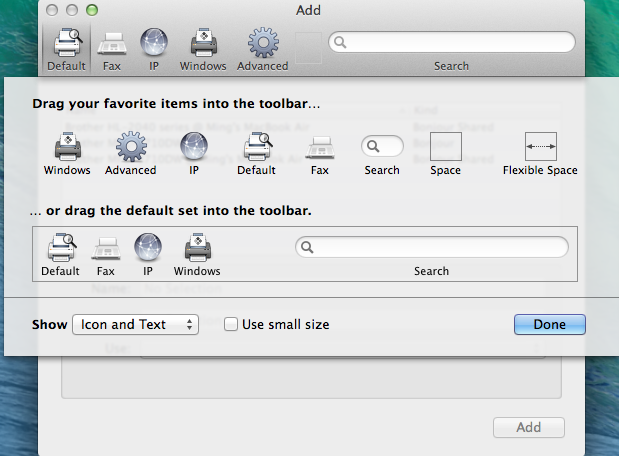
- Drag the Advanced icon into the toolbar and click Done.
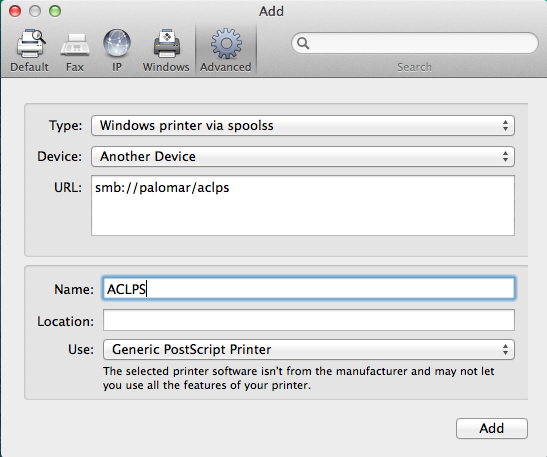
- Click Advanced and fill in the fields:
Type Windows printer via spoolss Device Another Device URL smb://palomar/printer_name(for example,smb://palomar/AclPS)Name Anything you'll recognize Use Generic PostScript Printer Then click Add.
- The printer now appears in your list. Select it when you print.
- The first time you print, macOS asks you to sign in. Enter your Math username and your Windows password. Check Remember this password in my keychain so you won't be asked again.
Troubleshooting: printing hangs after entering the wrong password
If you typed the wrong username or password in the sign-in pop-up and saved it, your Mac keeps sending the wrong credentials. Jobs then sit in the queue and never print. To fix this, delete the saved password and sign in again.
- Open Keychain Access. Press Command + Space, type
Keychain Access, and press Return. - Make sure the login keychain is selected, then type
palomarin the search field in the top-right corner. - Select each entry for
palomar, then press Delete (or Control-click and choose Delete). Confirm when asked. - Go back to Printers & Scanners, open the printer's queue, and delete any stuck jobs.
- Print your document again. When the sign-in pop-up appears, carefully enter your Math username and Windows password.
Still not printing? Make sure you're connected to UCLA-MATHNET and that your Windows password was set at a Math Windows machine. If jobs still hang, remove the printer from Printers & Scanners and add it again using the steps above.